What is a PDCflow Payment Portal?
A PDCflow payment portal is a web-based interface that allows businesses to accept payments online through credit cards and ACH (digital bank account payments) securely and in compliance with industry standards. Portals can be customized to match your organization’s branding and workflow needs, integrating seamlessly with your business processes and recordkeeping.
- Payment portals are designed for easy customer (payer) use, helping organizations collect payments quickly and efficiently.
- Businesses can set up multiple portals for different departments, branches, or payment types, using unique URLs for access.
How to Configure a PDCflow Payment Portal
Administrators can fully control the look, feel, and functionality of each payment portal.
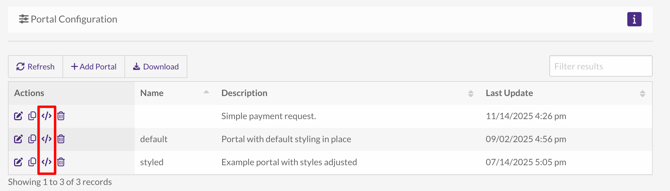
 Navigate to Configure > Portals to view a list of available portals. Click the edit icon to adjust an existing portal. Click "+ Add Portal" to create a new portal.
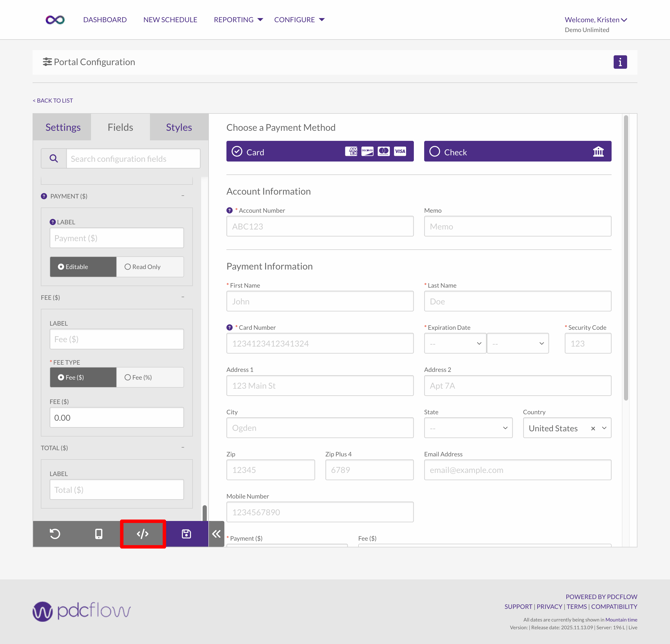
 The configuration controls are divided into tabs for Settings, Fields, and Styles.
Settings Tab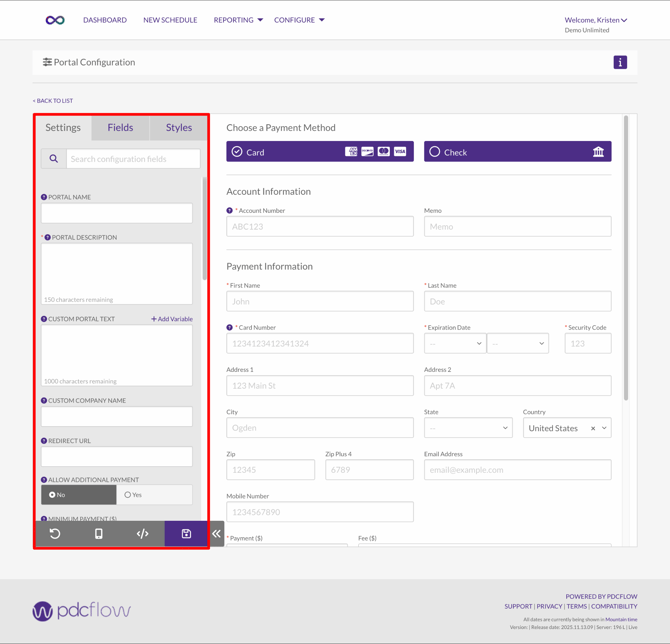
- Portal Name
The name is used to create a unique URL for payer access, and so it must be 1-11 lowercase letters or numbers, or left blank for a default portal with the shortest URL. - Portal Description
A description that will be displayed on the Portal list page. This will never be shown to your customers, it is for internal reference only. - Custom Portal Text
This text will be displayed in the required confirmation checkbox area of the portal that is located above the Process Payment button. (It will not be displayed on a receipt.) To include a clickable URL within this text, select the "+ Add Variable" option. - Custom Company Name
Leave this field blank unless you want to change the company name that is displayed on the portal and receipts. This will also remove the default logo that has been setup. If your app has activated company hierarchy configurations, location names will override this value.Redirect URL
By populating this field with a valid URL (beginning with https://) a Done button will be displayed on the receipt screen. When the Done button is clicked the browser will be redirected to this URL. If this field is left blank the Done button will not be displayed. - Allow Additional Payment
When enabled, two buttons appear on the receipt page:- New Payment: Opens a blank portal for submitting another payment.
- Duplicate Payment: Reloads the form with the payer’s previous information pre-filled to make an additional payment easier.
- Minimum Payment ($)|
The minimum amount that is allowed to be processed on a one-time payment. For example, if set to $5.00, no payments under $5 will be allowed to process. This setting does not apply to schedules. To set minimum schedule amounts, go to Configure > Schedules. - Schedule Options
These settings will adhere to your app's Maximum Terms Table configurations. If an account balance doesn’t qualify, that schedule option won’t be shown.- Pay Inn Full Today: Full payment is always offered to payers.
- 4 Equal Payments: This option will give payers the ability to split their total payment amount into four equal payments; if the payment amount is too low, the the payer will automatically be offered only 3 or 2 payments.
- Payments Of A Minimum Amount: This option lets payers split their total payment into as many installments as possible, based on dividing the total amount by the minimum payment amount set in your Schedule Settings.
- Schedule Allowed Start Days
How many days into the future will you allow the first schedule payment to be? - Payment Options
Determine if you want payers using portal can pay by card, check, or choose either. - Default Payment Option
When payers arrives at this portal, this setting will determine if the card or check form is initially displayed. - Card Settings Account Directive
Choose which processing account transactions from this portal should use. For cards, if a zero cost directive is selected, the fee type and fee amount will no longer be editable on this screen. - Check Settings Account Directive
Select which account directive this portal uses for processing ACH transactions. For ACH payments submitted via a portal, choose a directive with SEC code WEB. All ACH payments need an SEC code. Learn about authorization requirements and NACHA-mandated SEC codes in our guide "Electronic Funds Transfer Act Authorization Requirements."
- Payer Notification
If the payer enters an email while making a payment, should a receipt be sent to that email automatically? This setting will affect initial payments, as well as voids and credit payments. - Allow Event Notifications
Should the types of notifications set in Configure > Notifications be triggered for this portal or should events be ignored? - Custom Receipt Text
The text entered into this field will be displayed at the bottom of all receipts generated through this portal. - Department Access
This setting controls which departments can access the portal when employees send Flow requests through the Dashboard or view Flow requests and financial transactions through Reporting. Only employees assigned to the selected departments will have access to this portal. If no departments are selected, department restrictions will be ignored, allowing access without departmental limits.
Fields Tab
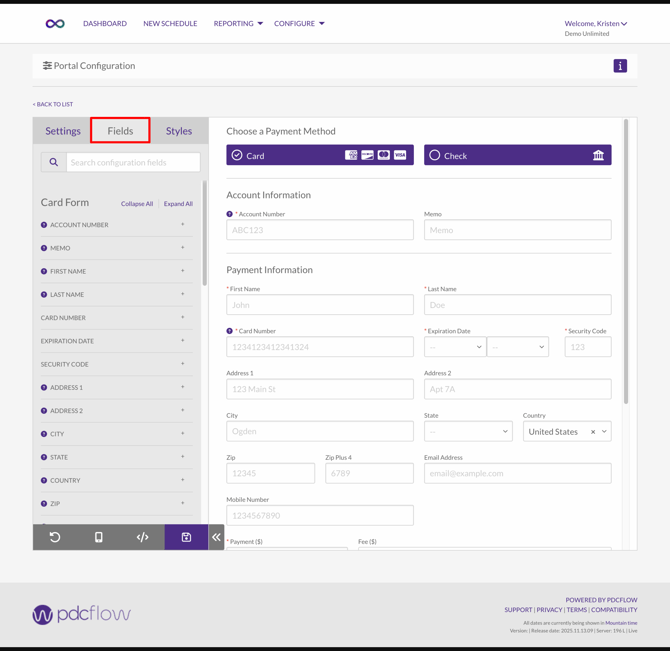
The Fields tab separates controls for card and check payments, allowing you to require and label fields differently for each type. For example, you might require address and zip code for card payments but make them optional for checks.
A preview panel shows how your portal will look based on your selected settings.
 Each field has specific configuration options, which may include:
-
Hide / Show / Require: Control whether the field is hidden, visible but optional, or visible and required.
-
Hide: The field is not shown to the payer.
-
Show: The field is visible.
-
Require: The field must be completed before continuing.
-
-
Label: Change the default field label if needed. For example, you might change "First Name" to "Cardholder First Name" if a parent may be submitting a payment for a child.
-
Placeholder: Edit the hint text shown inside the field before the payer types.
-
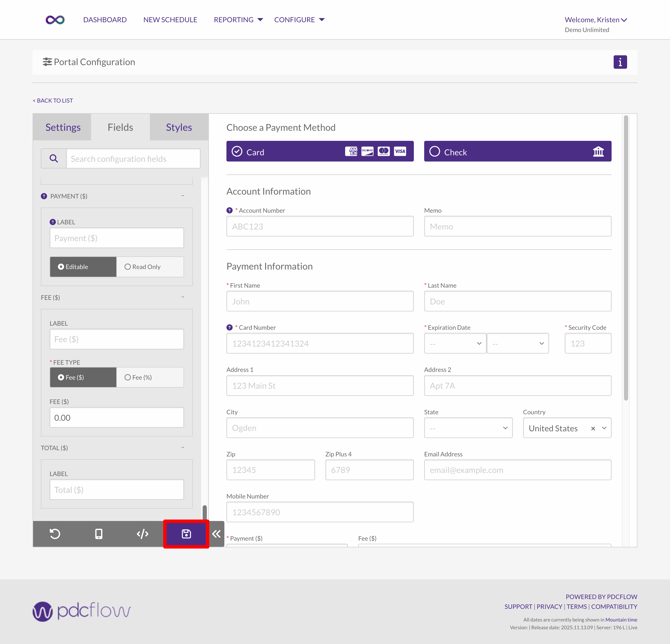
Editable / Read Only:
-
Editable: The payer can enter or change the field’s value.
-
Read Only: The field shows a fixed value that payer can see but cannot edit or interact with. This is useful, for example, to set a fixed payment amount for Flows sent to request payments of a specific amount.
-
Review and adjust all options in the Fields tab to ensure each field has the correct settings, including visibility, required status, and supporting text.
Styles Tab
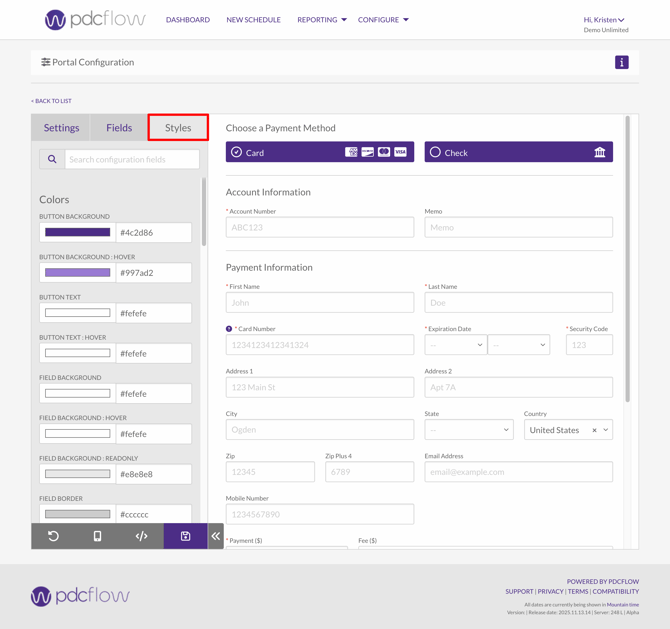
The Styles tab offers full customization of a portal’s color scheme, fonts, and button styles. Use the options in this tab to match the portal’s appearance to your brand or website for a seamless payer experience.
When you have finished adjusting your portal configuration, click the save icon to apply and save your changes.
Portal URL and Access Options
You can view and download several access options for your portal, including the URL, access code, API documentation, and QR code.
 To get the portal URL, simply click the code icon, which is available on both the portal configuration and list pages.
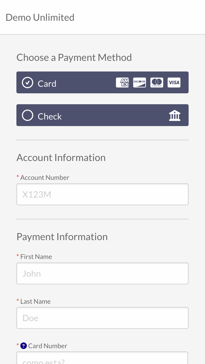
How Payers Submit Payments Using a Portal
Payers access your organization's unique portal URL. To see an example portal, you can visit https://appalpha.pdcflow.com/3967810/ideal.
 Portals will work smoothly on both browsers and mobile devices.
-
- Entering account and payment details (name, card or bank info, address, etc.).
- Reviewing payment amounts and any applicable fees.
- Reading terms and conditions or confirmation statements.
- Completing required authorizations.
 After submitting, the payer receives an on-screen confirmation and access to email a receipt
PDCflow portals are designed for clarity and ease of use. Administrators can create one or many portals, configured to meet each business need.
Need Help?
Email our Customer Success team at support@pdcflow.com.