Permission to Edit Schedules
Only users who are assigned to a Security Group with the Reporting - View Schedules role as well as either of the following two roles can edit schedules:
- Services - Check Schedules
- Services - Card Schedules
In this documentation, we will explore the steps to edit a payment schedule.
Step 1: Sign in to your PDCflow account, click on Reporting from the top navigation, and select All Schedules under Schedules.

You will be navigated to a Search Options screen where you can filter down the schedules to find the desired schedule you want to edit.

Step 2: Select the appropriate schedule status(es) and click on the Search button.

Note: Active is the default schedule status. You don’t need to select a schedule status if you are looking for an active schedule and can continue by just clicking Search.

After clicking Search, the relevant schedules will be displayed in a list.

Now, you can perform two search-related functions on this screen displaying existing payment schedules:
- Filter Results
- Change Search
1. Filter Results
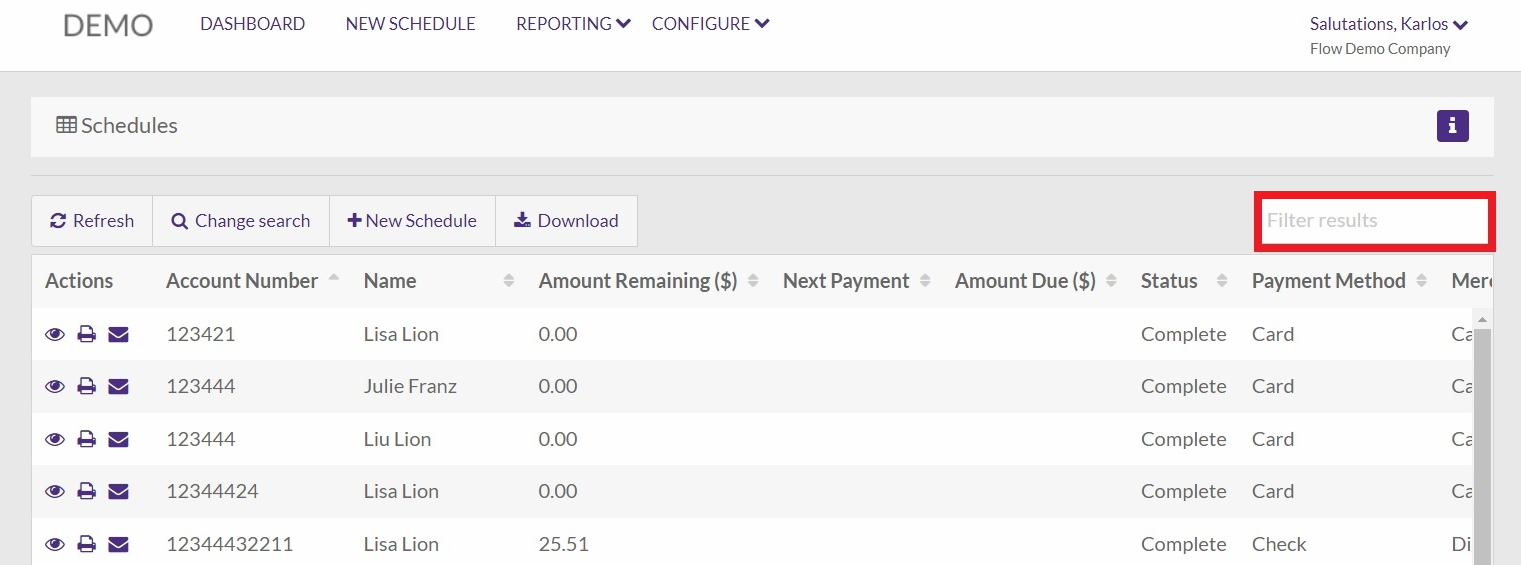
Filter the results in the Payment Schedule list by entering the relevant keyword in the Filter Results field. For example, if you will search for Lisa, all the payment schedules created by Lisa will appear in the list.
2. Change Search
If you don’t find the desired payment schedule you are looking for, you can change the search by clicking on the Change Search button and the Search Options page will open again (i.e. you will be navigated back to Step 2 to run your search again).

Step 3: If you've found the desired schedule, click on its Edit Schedule button (an eye icon).

You will be navigated to a Schedule Detail page displaying the details of your payment schedule, segregated into two columns.
On the left, you will see the schedule information, payment information, and contact information.

On the right, the payments are displayed in a table that will show you the date, the amount, the status, and (when applicable) the transaction ID of each payment in the schedule.
The schedule's history is displayed below the Payments table.

Step 4: Click on the Actions button at the top-right corner of the Schedule Detail page and select Edit Schedule to update the schedule.

You will be navigated to an Update Schedule page.
Step 6: Update the required information such as account information, schedule information, payment information, contact information, and notification information on the left of the Update Schedule page.

Step 7: If present, check the declaration box on the right of the Update Schedule page after you’ve read and certified the message as required.

Step 8: Click on the Update Schedule button to save the updated information.

Things to Consider
There are a few important things to consider when editing a schedule:
- To edit a schedule's terms (including payment amounts and dates) select YES for Edit Schedule Terms on the Update Schedule page.

- The Current Balance reflects the remaining balance for the schedule's payments that haven't been processed yet.

- If you change a schedule's terms or payment method on the Update Schedule page, it is highly recommended that you also request consent again by setting Send Consent Request to YES and sending a Flow. The schedule will be saved when you click Update Schedule.

If a Flow has been sent, the schedule won't be updated to active until the Flow has been completed successfully. The schedule will automatically be updated to active and payments will process as scheduled once the Flow is completed successfully.
Note: If the consent request is not completed, is declined, or expires then no payments on the schedule will process.
Need Help?
Email our Customer Success team at support@pdcflow.com.