In this article, we'll review how to do the following tasks.
- Creating a Test Flow
- Sending a Test Flow
- Completing a Test Flow
- Configuring Other Flow Templates
Let’s get started.
Creating a Test Flow
Step 1: Sign in to your PDCflow account, click on Configure from the top navigation, and select Templates from the drop-down menu.
You will be taken to the Templates page.
Step 2: Click on + New Template and select the Flow option from the dropdown menu.
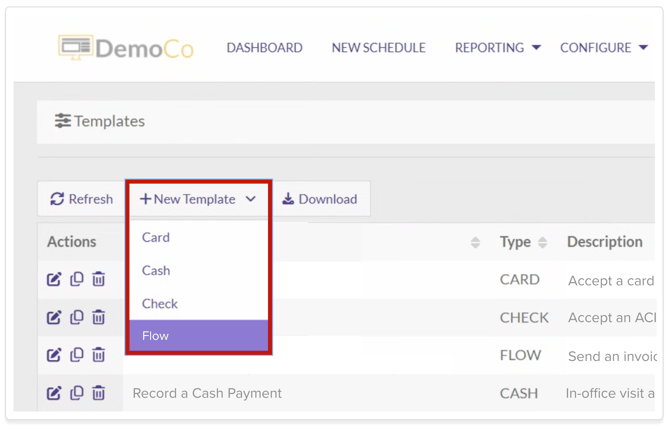
You will be taken to the Create a Flow Template page.
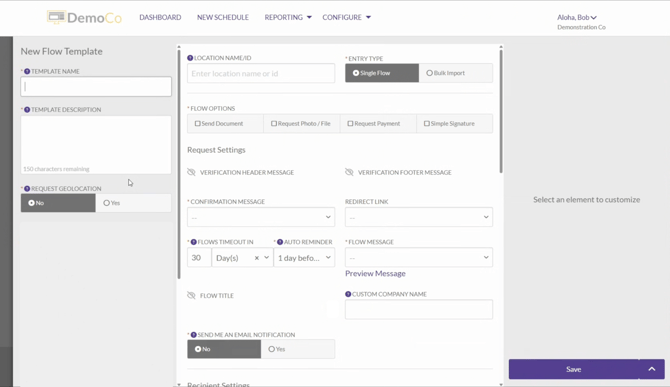
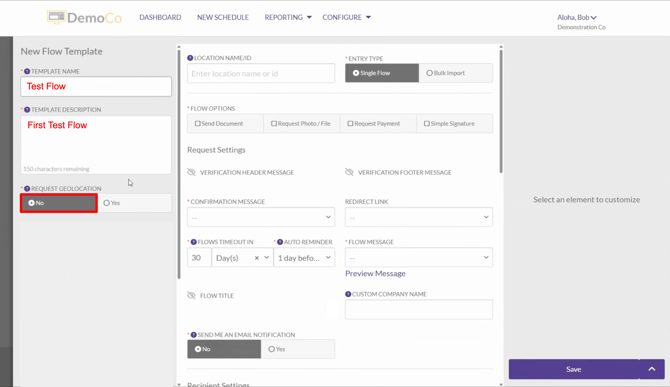
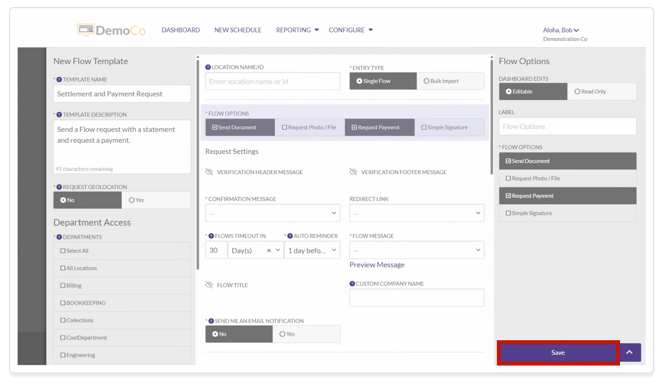
Step 3: In the left-hand column, enter a name and description for the Flow template in the Template Name field and Template Description fields, respectively.
|
Fields |
Recommended Values |
|
TEMPLATE NAME |
“Test Flow” |
|
TEMPLATE DESCRIPTION |
“First Test Flow” |
|
REQUEST GEOLOCATION |
“No” |
Step 4: Use the interactive preview to select fields. Configuration options for the selected field will be displayed in the right-hand column.

Make the following configurations:
- FLOW OPTIONS: Select "Send Document"
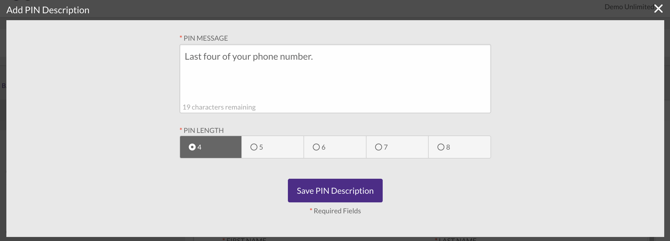
- PIN DESCRIPTION: Click "New" and enter a PIN Message like "Last four of your phone number," and click "Save PIN Description." Then select this option.
- CONFIRMATION MESSAGE: Click "New" and enter a message like "This request has been completed." Click "Save confirmation message." Then select this option.
- ACCOUNT NUMBER: Select "Show."
Step 5: Click the save button, and the Flow template will be saved.
Sending a Test Flow
To send yourself a test Flow, follow the steps below.
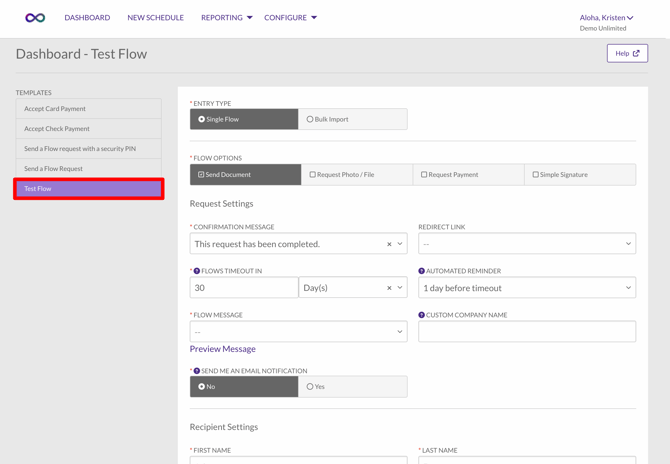
Step 1: Click on the Dashboard option in the top navigation.
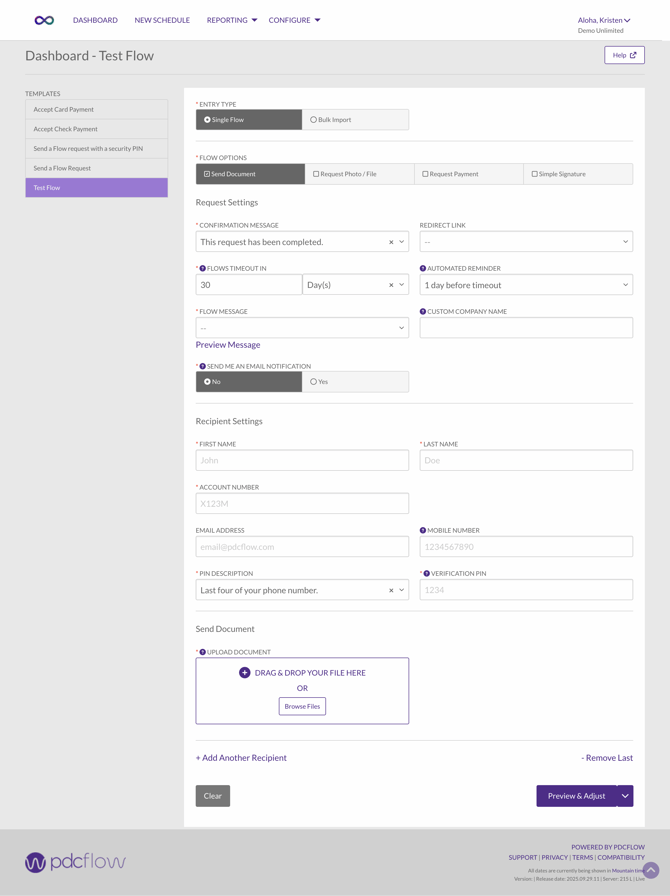
Step 2: Select Test Flow from the Templates listed in the left-hand column.
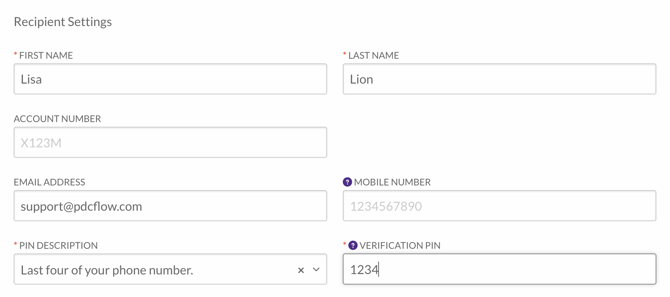
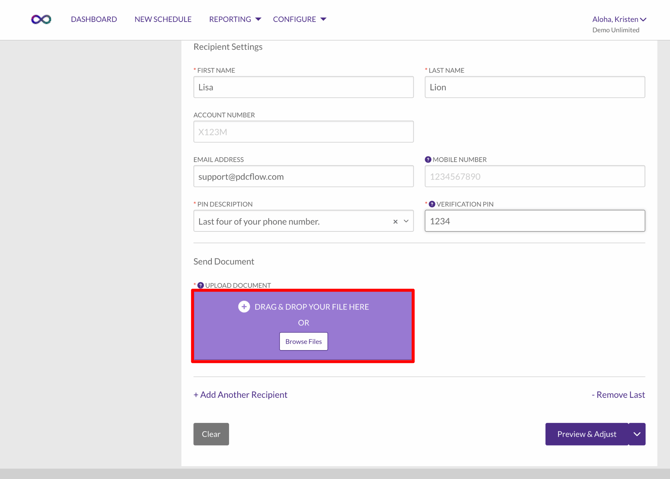
Step 3: Enter information and make selections (required fields are marked with a red asterisk "*"):
- EMAIL ADDRESS: Enter your own email address for testing purposes.
- FIRST NAME: Enter your own name for testing purposes.
- LAST NAME: Enter your own name for testing purposes.
- VERIFICATION PIN: Enter "1234" for testing purposes.
Step 4: Upload a document by dragging and dropping it into the upload area. You can use your own PDF or this example contract: Example contract PDF for testing purposes: https://3821094.fs1.hubspotusercontent-na1.net/hubfs/3821094/Example-Contract-1.pdf
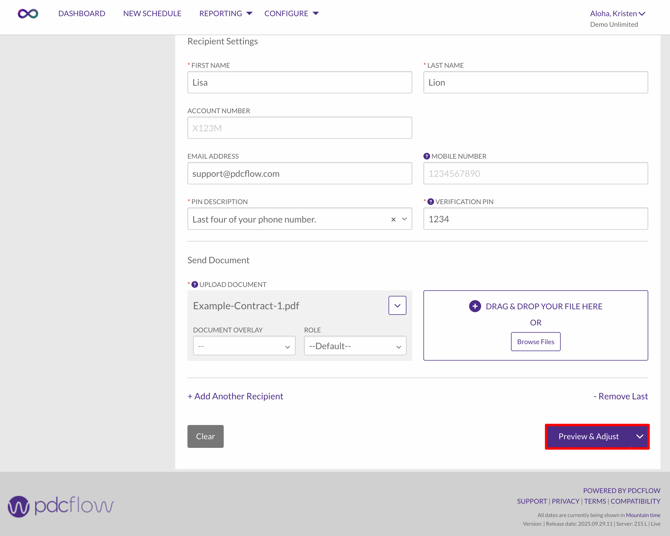
Step 5: Click on the Preview & Adjust button.
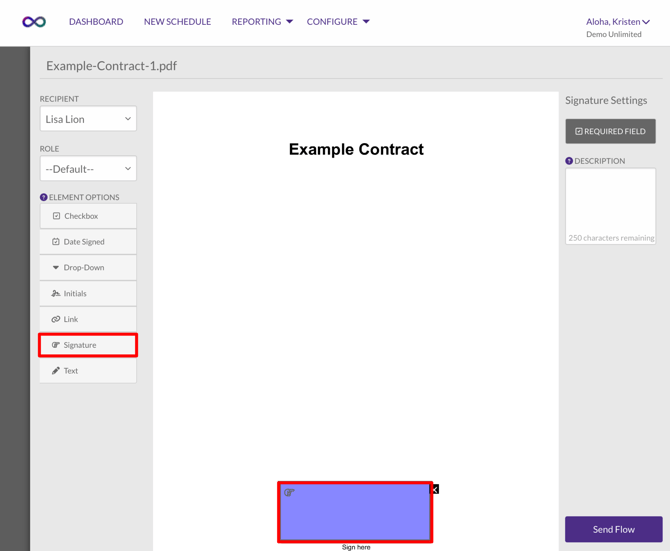
Step 6: Click "Signature" in the ELEMENT OPTIONS, then click on the document preview where you want the signature box to appear. You can resize the area as needed. This marks the spot for signing.
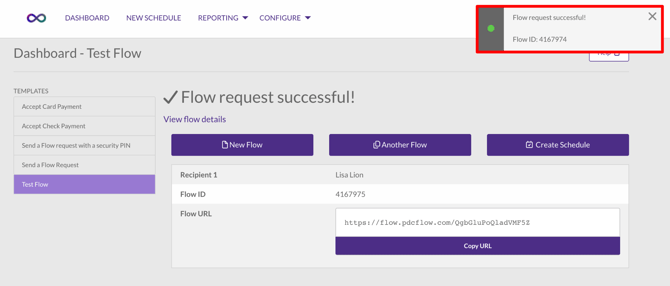
You will see a pop-up notification indicating that the Flow has been sent.
Completing a Test Flow Request
Once you have successfully sent your test Flow, you will receive an email and/or text message with access to the Flow. Follow the steps below to complete a test Flow.
Step 1: Click on the link in the email to view the Flow request.
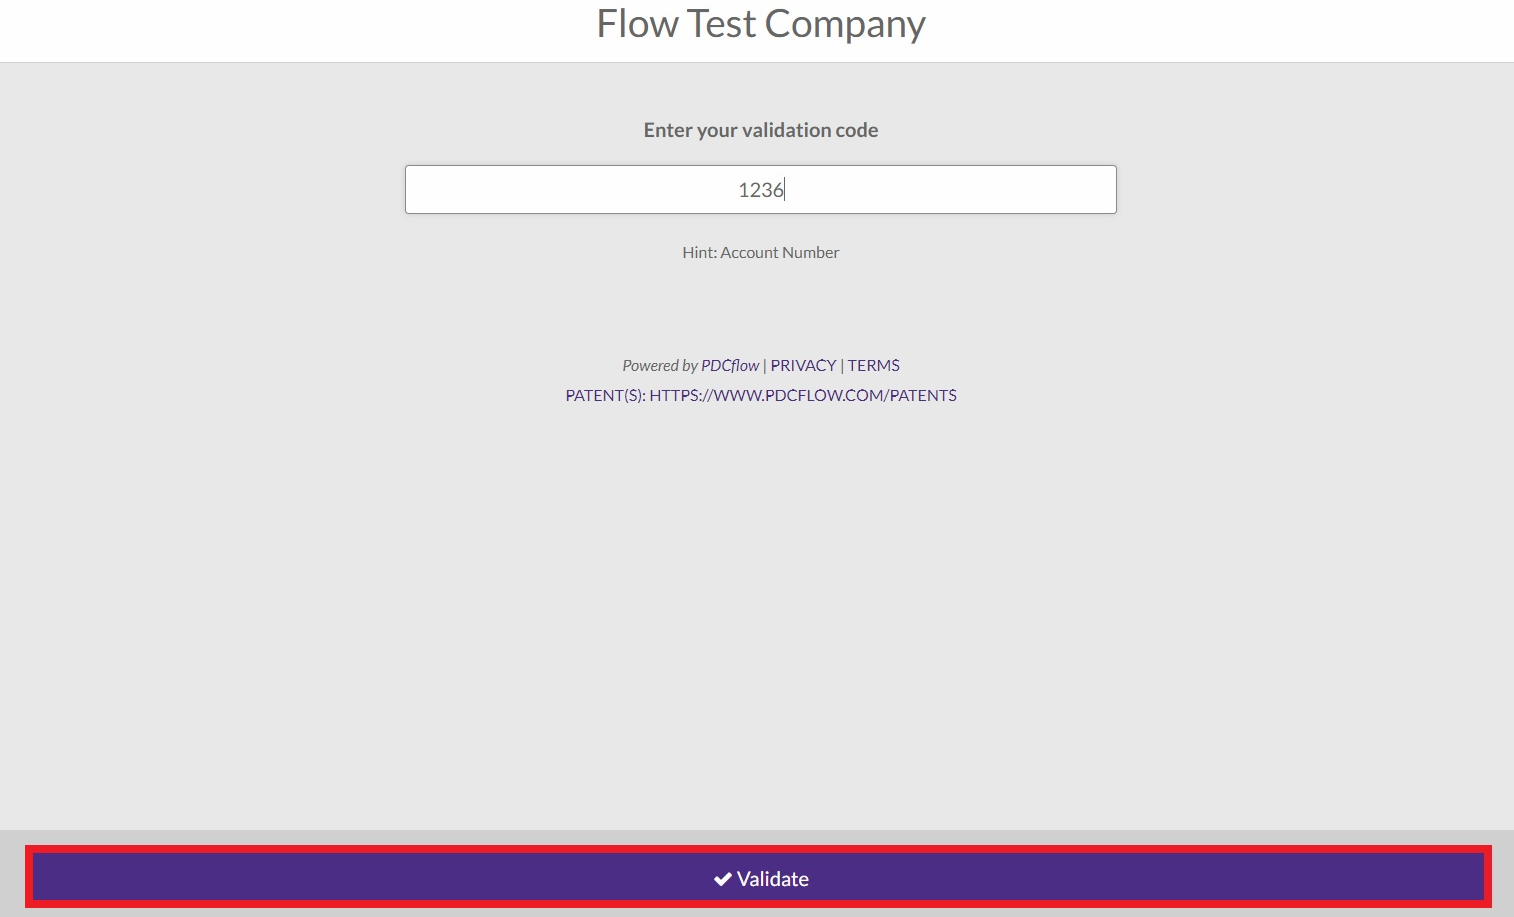
Step 2: Enter your validation code (enter the same 4-digit Verification PIN that you entered when creating the Flow for testing purposes) and click Validate.
Step 3: Click on the Signature area of the Example Contract.
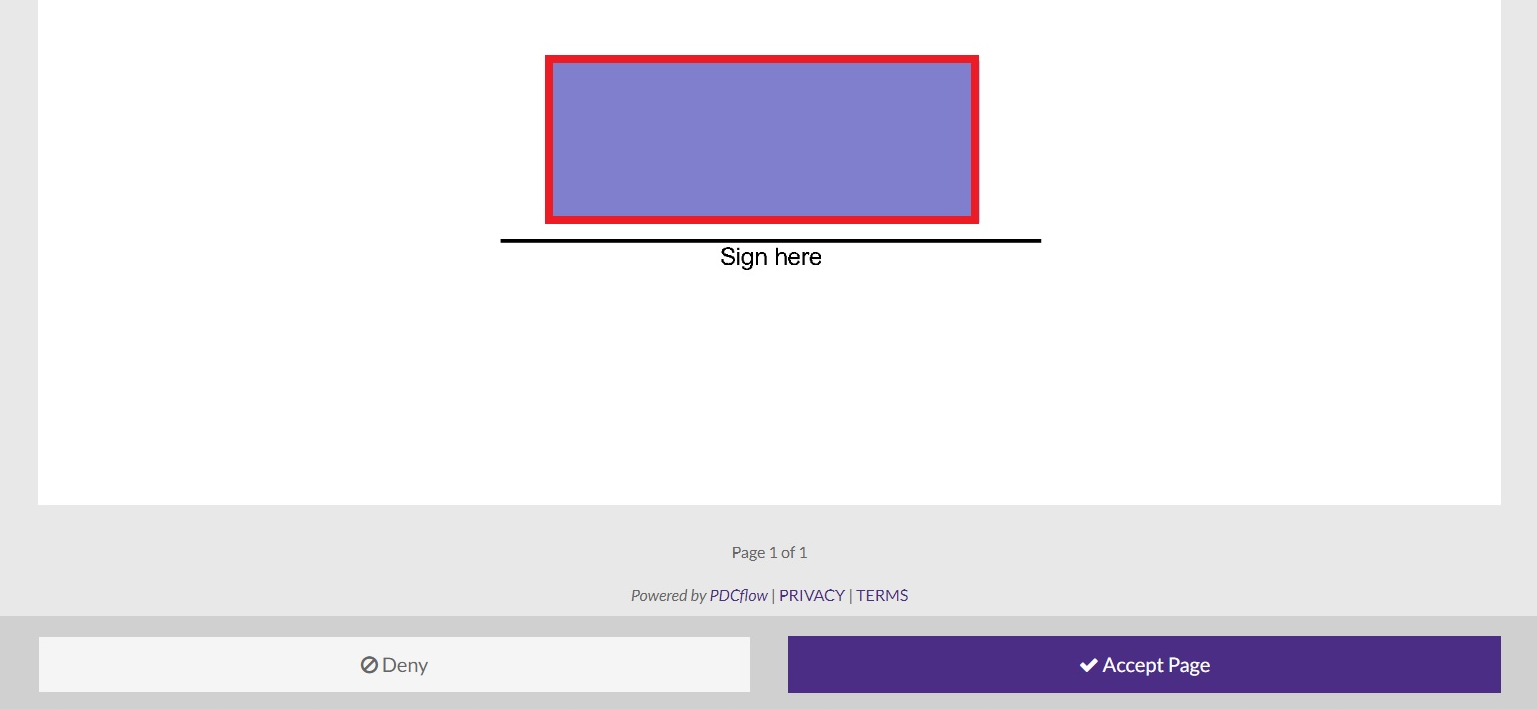
Step 4: Write your signature with your mouse and click Save.
Step 5: Click Accept Page.
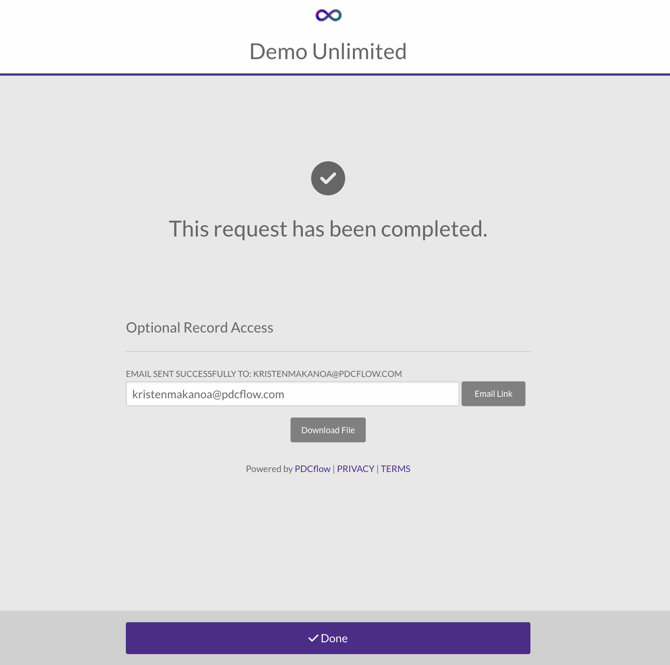
Step 6: Click Done to complete the Flow.
This article has covered the steps to configure a Flow template, send a Flow, and then complete the Flow request.
Configuring Other Flow Templates
Flow templates can be configured to suit your organization’s communication needs. The Flow options that you may want to utilize include:
- Send Document: Send contracts and agreements for customers' review and approval.
- Request Photo / File: Request and gather IDs or other documents and images from your contacts.
- *Request Payment: Send payment requests via email and text, and gather credit card and ACH payments from your customers.
- Simple Signature: Send a simple agreement for a customer to sign digitally.
Note: To have Payment Requests available, your PDCflow account must have Payment Services activated. Contact our Sales Team for more information.
Need Help?
Email our Customer Success team at support@pdcflow.com.
Example contract PDF for testing purposes: https://3821094.fs1.hubspotusercontent-na1.net/hubfs/3821094/Example-Contract-1.pdf