This guide will walk you through the process of using Bulk Import effectively.
Prerequisites
Before you begin, ensure the following conditions are met:
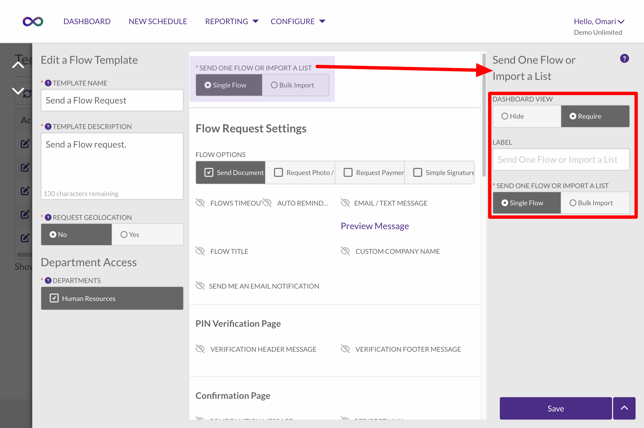
- Configure your Flow template to require an Entry Type selection. This will allow users to choose between Single Flow and Bulk Import when using the template.
- For document sending:
- All recipients will receive the same document (personalized, unique documents are not supported in Bulk Import).
- For best performance use PDFs under 5 MB and less than 50 pages.
- Max file size: 7 MB
- Max page count: 150
- Don't use password-protected or security-feature-enabled PDFs.
- Bulk Import can process up to 5,000 records per batch. For larger recipient lists, split your data into multiple batches of 5,000 or fewer records.
Step-by-Step Guide to Bulk Sending
- Log in: Access your account at app.pdcflow.com.
- Select Template: Choose the appropriate Flow template for your bulk request.
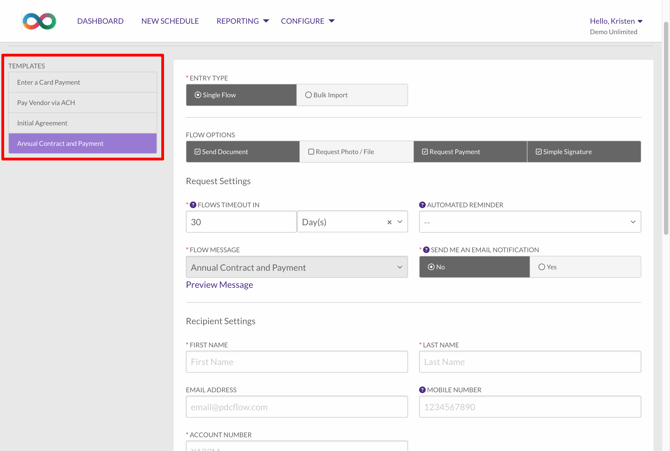
- Set Entry Type: Change the "Entry Type" to "Bulk Import."

- Fill Template Fields: Enter the relevant information into the template's fields.
- Upload Spreadsheet: Click "Select Field" to upload your prepared spreadsheet.
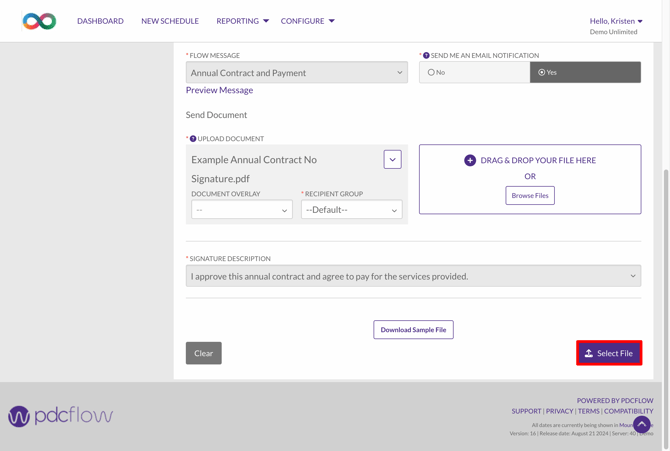
Tip: You can download a sample spreadsheet by clicking the "Download Sample File" option. - Data Entry: On the next page, you can either:
- Upload your completed spreadsheet, or
- Enter data manually.
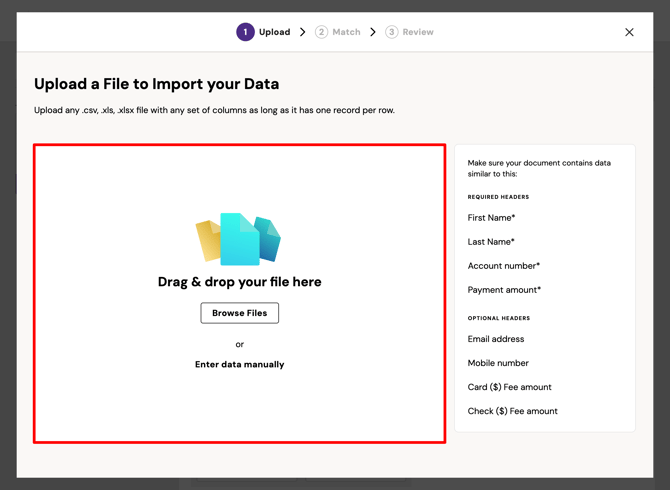
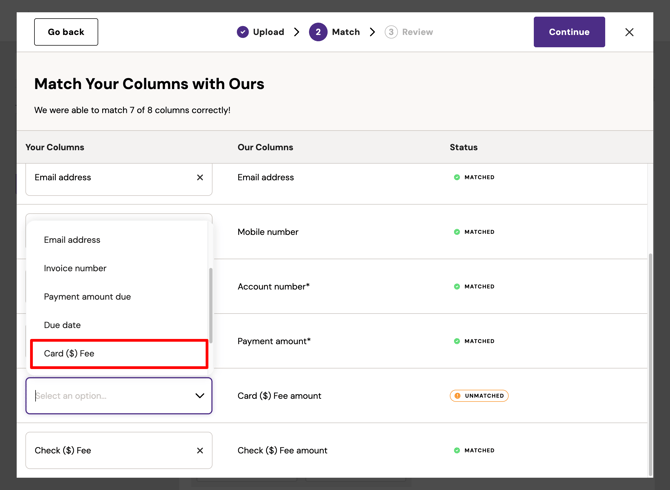
- Configure Headers: Select the header row in your spreadsheet. Click Continue.

- Map Columns: Review and match the columns in your spreadsheet to the appropriate fields in the Flow template. Click "Continue."
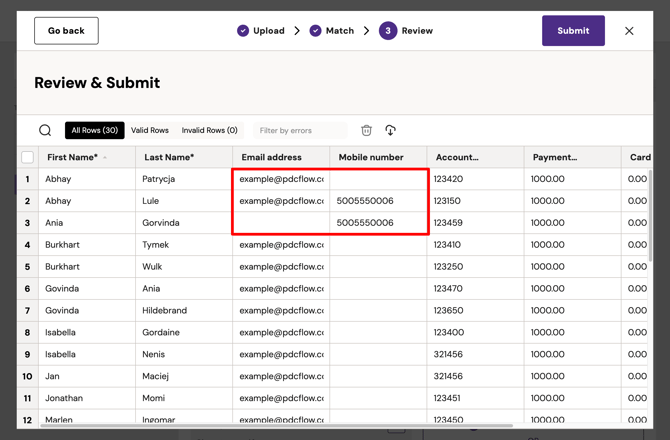
- Review and Submit: Review the records for accuracy and make any necessary corrections. Flow requests can be delivered in different ways. Delivery options include:
- Email: Sent if email address is provided.
- SMS: Sent if a mobile number is provided.
- Both: And email and an SMS will both be sent if an email address and a mobile number are included.
- Manual: If neither email nor mobile is provided, share the Flow's unique URL manually.
- Submit: To send the Flows to process, click "Submit."

- Confirmation: A popup will let you know that your spreadsheet is being submitted.
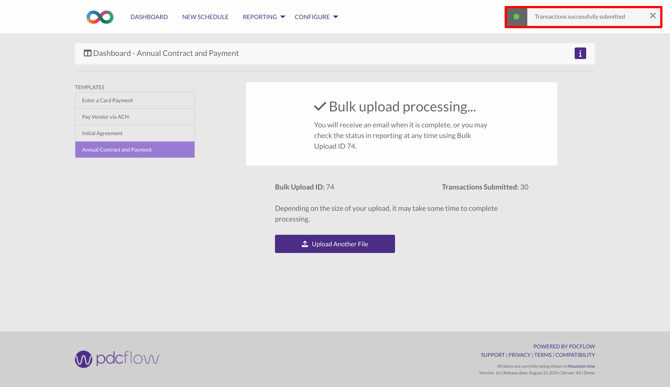
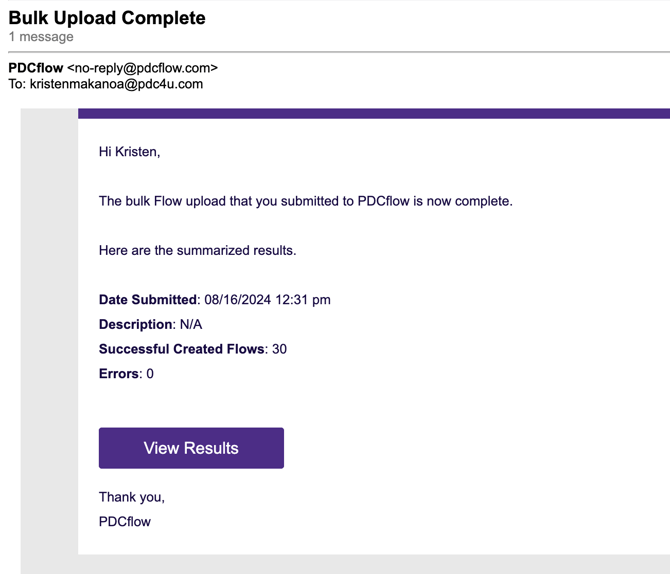
- Bulk Import Complete: After processing is complete, you'll receive an email with the results of your bulk import. This may take a few minutes for very large files.
Reporting
To access Flow reporting and track the status of your bulk requests:
- Navigate to Reporting > Flow Reporting in the main menu.
- Choose between two viewing options:
- Bulk Flows: View a set of records from a single bulk import.
 All Flows: Search for specific Flows or those not part of a bulk import.
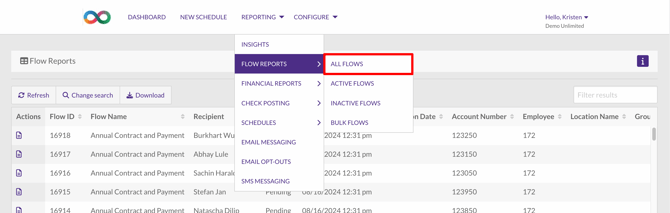
Best Practices
- Ensure your spreadsheet data is clean and formatted correctly before import.
- Add a meaningful description for bulk imports to identify different bulk imports more easily.
- Check your email for import confirmation to be able to review the results promptly.
By leveraging the Bulk Import feature, you can significantly reduce the time and effort required to send multiple Flow requests, improving your overall efficiency and productivity.
Need Help?
Email our Customer Success team at support@pdcflow.com.