The PDCflow application is used by organizations to create payments and send communication requests to customers. Request payments, contract or document approvals, images, and much more with PDCflow’s Flow Technology.
In this documentation, we will explore the steps to
-
Send a Flow From Your PDCflow Account Dashboard
-
How a Flow Recipient Completes a Flow Request
-
Accepting Credit Card Payments via Your Dashboard
-
Accepting Check (ACH) payments via Your Dashboard
Send a Flow From Your PDCflow Account Dashboard
The Dashboard is the homepage for your PDCflow account and is where all the payments are created and where Flow requests are sent to customers.
Flows are highly customizable templates that let employees send out requests to customers asking for information like payment credentials and contract approvals.
Note: Your organization’s system administrator will add templates to meet the business needs and will configure user profile access to templates. Some fields mentioned below won’t be present if your admin has determined they’re unnecessary.
To send a Flow from your PDCflow account, follow the steps below.
Step 1: Sign in to your PDCflow account to view the Dashboard.
Step 2: Select an appropriate template based on your requirements from the "Templates" section on the right side of the dashboard.
For example, the selected template here is “Send a Flow to request payment or consent”.
Step 3: Once you have selected a Flow template, enter the Location Name/ID of the Flow recipient in the form.
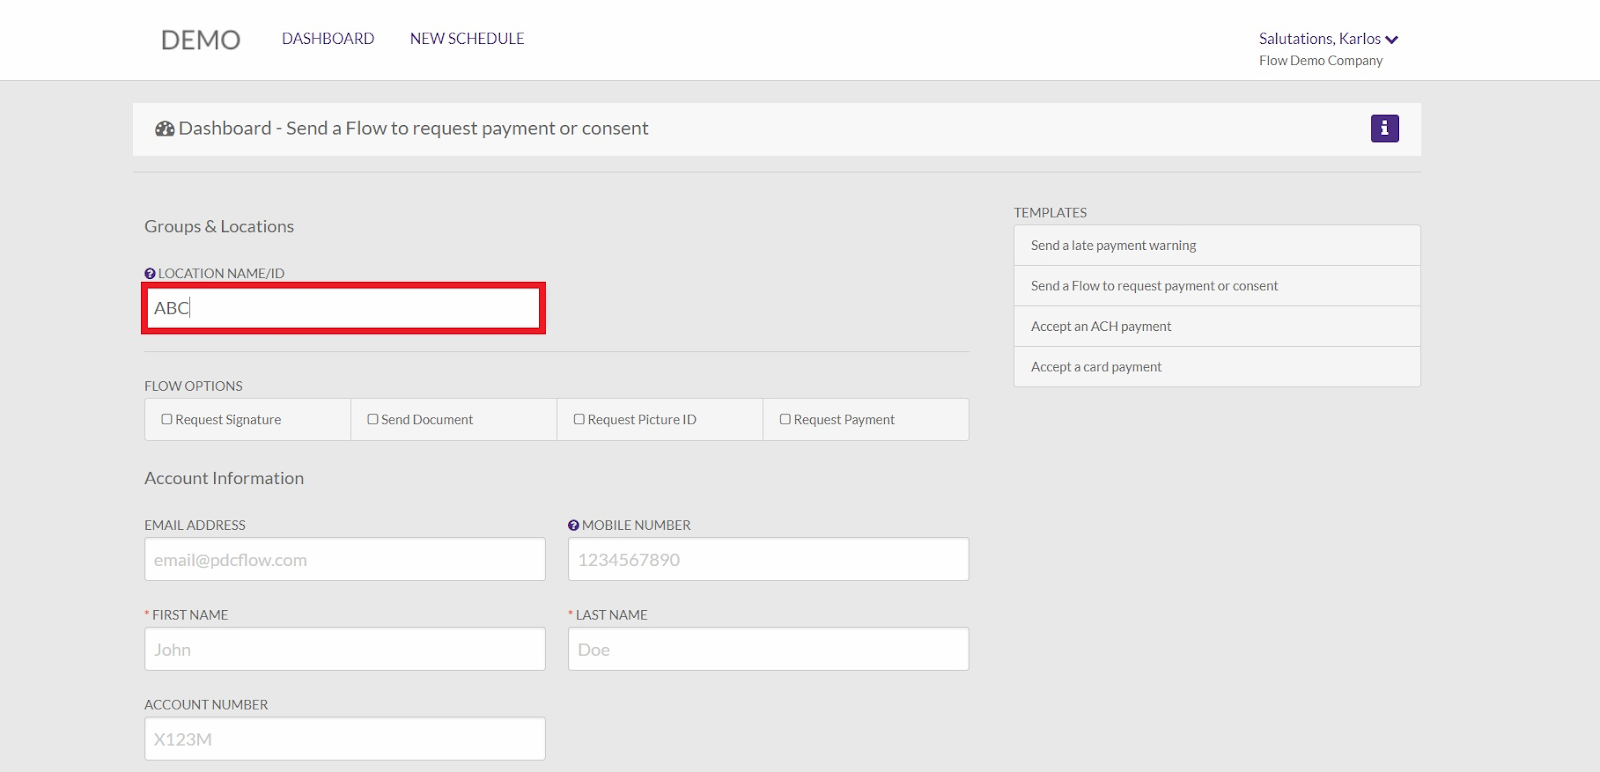
Step 4: Select a Flow Option according to which pages should be presented to the Flow recipient.
For example, the selected Flow option here is Request Payment which would send a payment request for a specific amount and allow the customer to enter their payment information.
For more information on Flow options, please refer to this documentation: Sending Flow Requests.

Step 5: Enter the Account Information for the Flow recipient (see table below for detailed descriptions)
| FIELD | DESCRIPTION |
| Email Address | Email address of the Flow recipient to request to complete the Flow |
| Mobile Number | Mobile number of the Flow recipient |
| First Name | First name of the Flow recipient |
| Last Name | Last name of the Flow recipient |
| Account Number | Account or reference number. This is often the customer account number from your system-of-record |
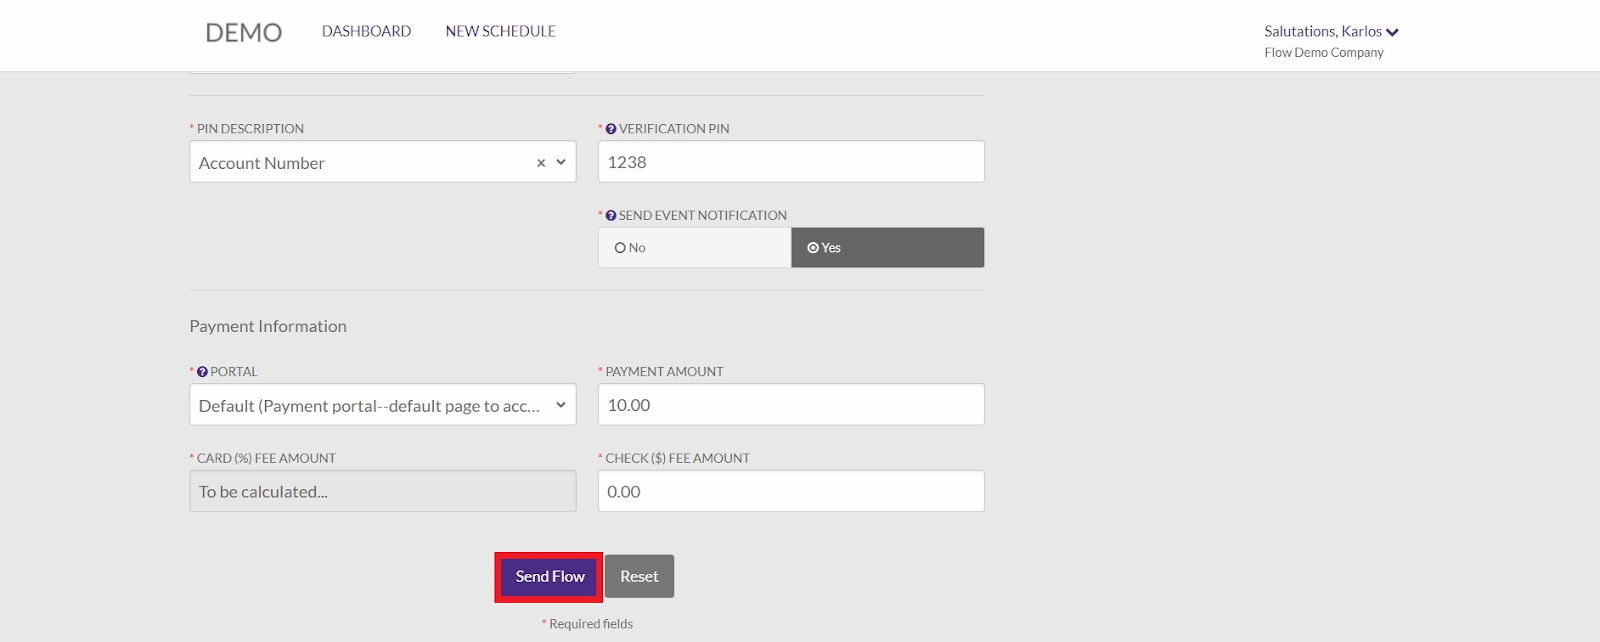
| PIN Description | Description that a Flow recipient will see as a hint for their verification PIN. It might be the last 6 digits of a reference number, the last 4 numbers of a cell phone number or account number. |
| Verification PIN | PIN, or shared secret between your company and Flow recipient, that the customer (Flow recipient) will use to enter a Flow to view and complete the Flow request. It should be to answer the value for this customer’s PIN description. |
| Send Event Notification | YES/NO Decide if you—the person sending the Flow— would like to be notified when a Flow reaches a final status:
|
Note: The fields appearing under Account Information will depend upon the Flow template selected.
Step 6: Enter the Payment Information including the following fields:
| FIELD | DESCRIPTION |
| Portal | A payment request must use a portal you have previously defined. Most settings will come from the portal rather than being defined here. |
| Payment Amount | Amount payable by the Flow recipient (customer) |
| Card (%) Fee Amount | Percentage fee associated with the card payment |
| Check ($) Fee Amount | Flat fee associated with the check payment |
Note: The fields appearing under Payment Information will depend upon the Flow template selected.
Step 7: Click on the Send Flow button to send the Flow to the customer via email address, mobile number, or with the unique URL for the Flow.
Upon clicking the Send Flow button, a pop-up message will appear to let you know if the Flow was sent successfully—“Flow Request Successful” (along with the Flow ID) and you will be redirected to a Flow Request Successful page.

The Flow Request Successful page displays the Flow ID, Flow URL, and some options, including -
| FUNCTION | DESCRIPTION |
| New Flow | Start a new, blank, Flow |
| Another Flow | Start another Flow using the same information |
| Create New Schedule | Create a new schedule with pre-entered information from this Flow |
| Copy URL | Copy this Flow’s unique URL |
How a Flow Recipient Completes a Flow Request
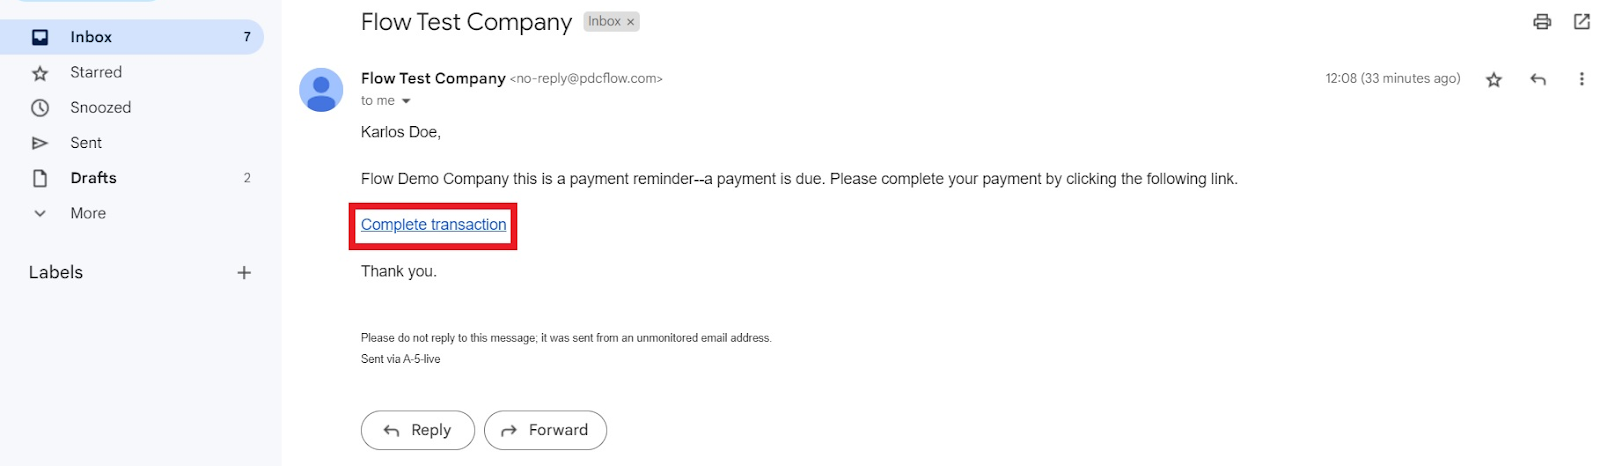
After you’ve successfully sent a Flow request, the Flow recipient will receive an email or SMS from PDCflow with a link to open the unique URL for the Flow request.
With that link, the Flow recipient will be able to open, view, and complete the Flow as follows.
Step 1: Click on the link received via email, SMS, or directly from your point of contact to open the unique URL for your Flow request.
Step 2: Enter a validation code to verify your identity and view the Flow contents. Click on the Validate button to confirm your identity.

Step 3: Upon successful validation, view and complete the Flow request. In this example, a payment portal form is displayed with two payment options: Card and Check.
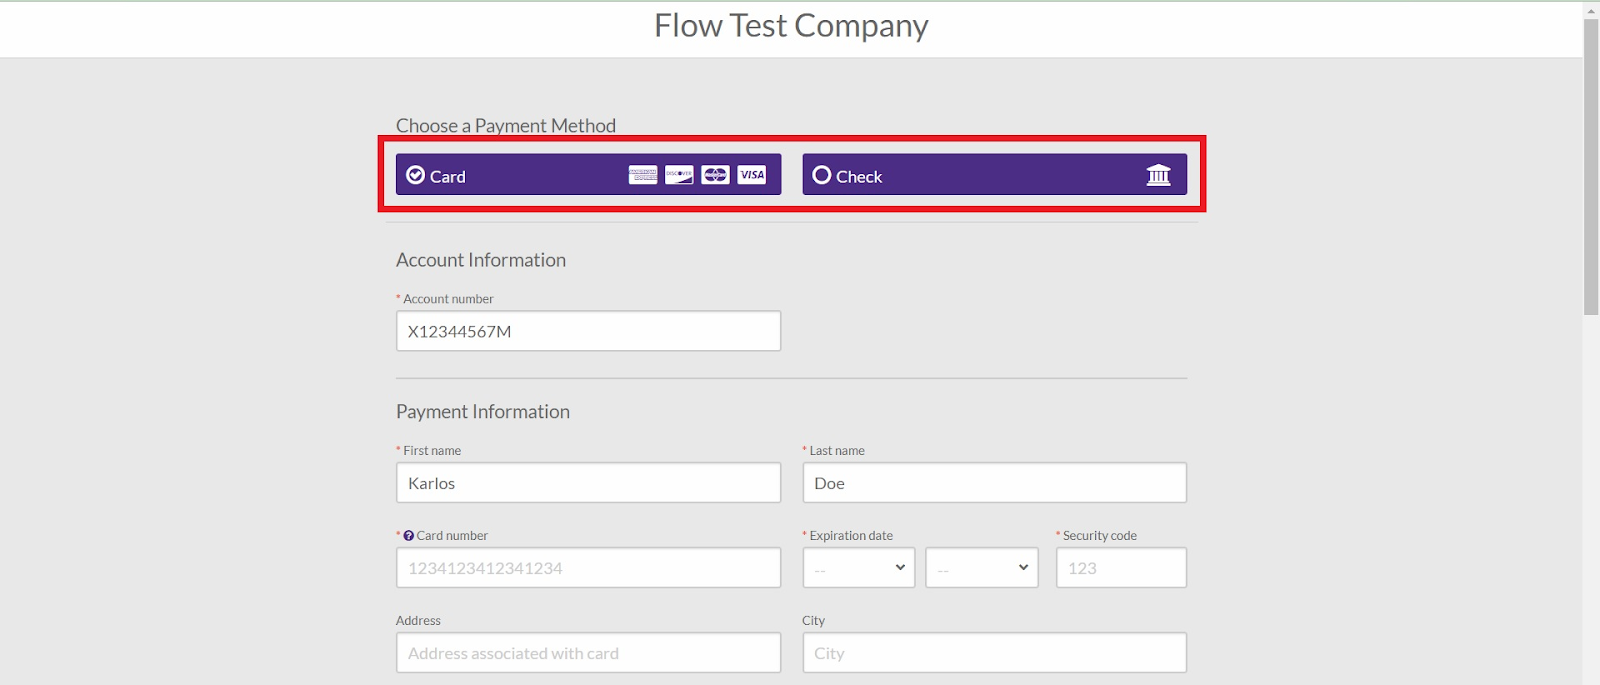
Step 4: Enter the payment information such as payer’s first name, last name, card number/check number, expiration date, security code, address, city, and more.

Note: The fields marked with a red asterisk (*) are mandatory.
Step 5: Review and check the authorization confirmation boxes and click on the Process button to submit payment.

Upon clicking the Process button, you will be redirected to a new page with a thank you message and additional options:
- Send Link: send a transaction report to your email address
- View Transaction Report: open the transaction report in PDF format with options to save and download it immediately

Accept a Credit Card Payment via the Dashboard
To accept a credit card payment via Dashboard, follow the below steps:
Step 1: Sign in to your PDCflow account and navigate to the dashboard.

Step 2: Select a card template (in this example the Accept a card payment template) from the “Templates” section on the right-hand side of the dashboard.
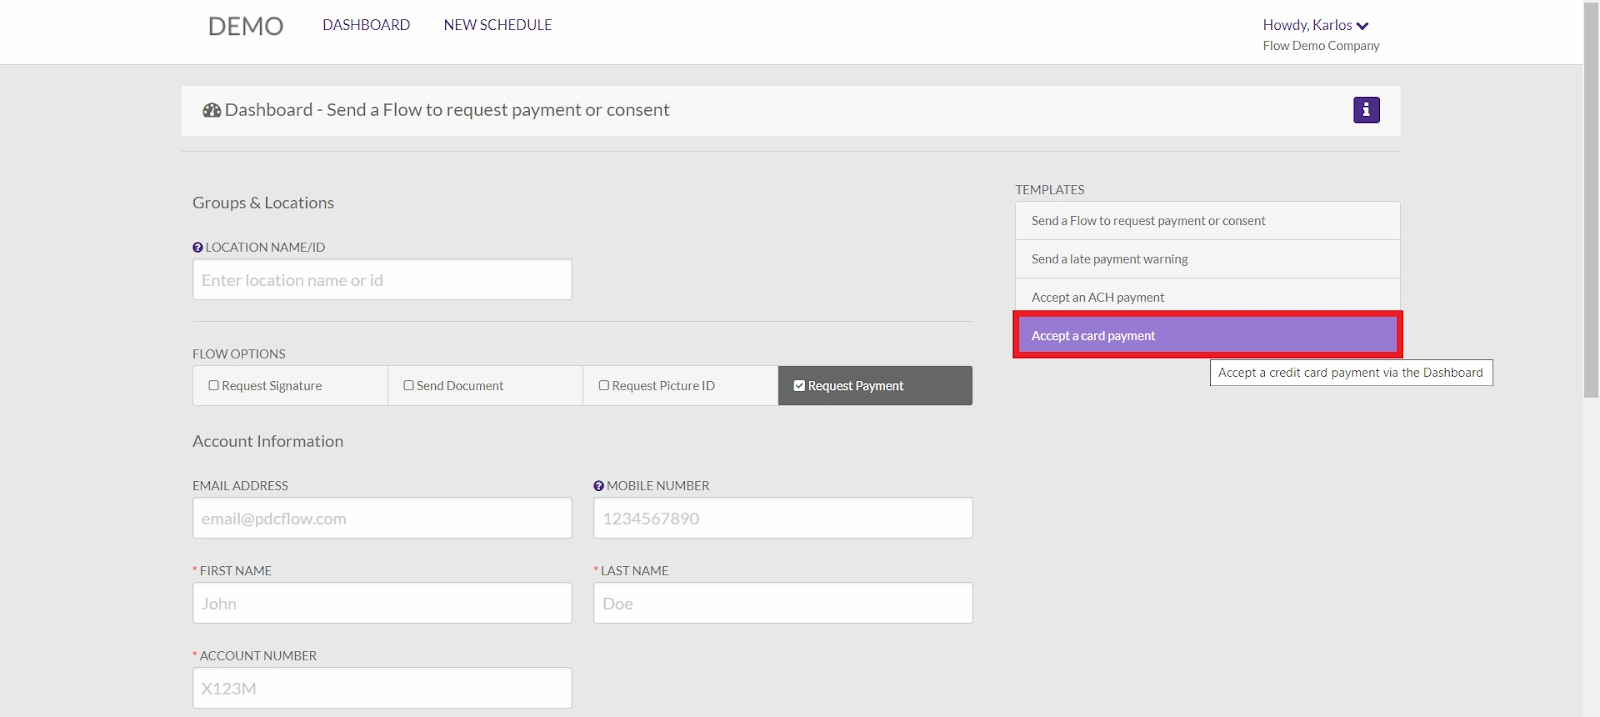
Step 3: Once you have selected a Flow template, enter the Location Name/ID of the cardholder in the form.
Step 4: Enter the Account Information of the cardholder, including the following fields. Fields may or may not be included, required, or optional depending on your admin’s configuration settings for the template.
| Field | Description |
| First Name | First name of the cardholder |
| Last Name | Last name of the cardholder |
| Account Number | Account number for the customer you’re receiving payment for |
| Address | Address of the cardholder |
| City | City of the cardholder |
| State | State of the cardholder |
| Zip | ZIP code |
| Email Address | Email address of the cardholder |
Step 5: Enter the Payment Information such as card number, expiration date, security code, card merchant account, payment, fee, total, etc.
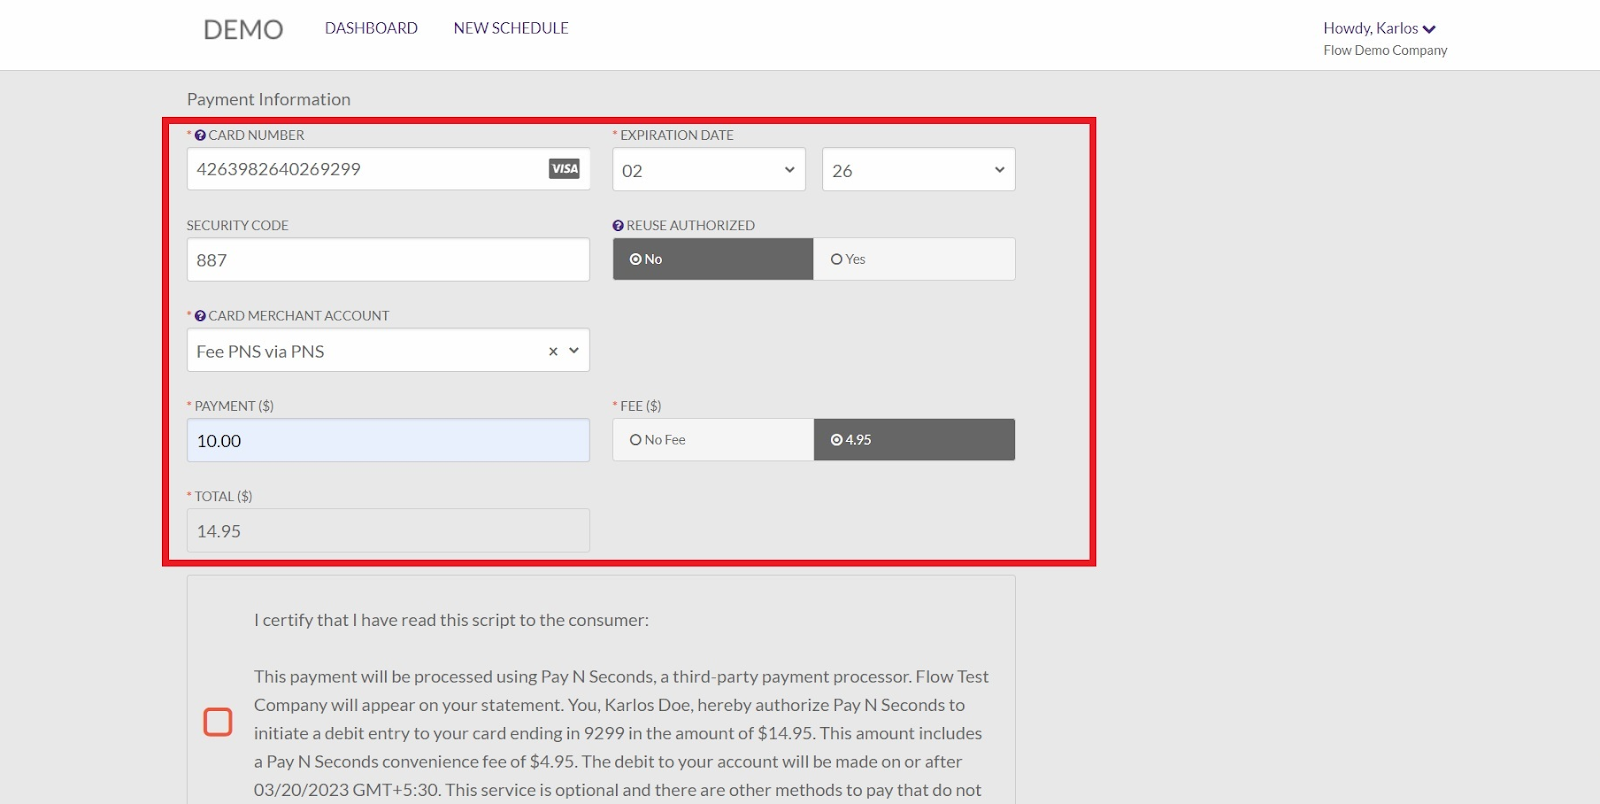
Step 6: If it’s present, check the consent authorization box after receiving the required verbal authorization from the customer.

Step 7: After filling out the form, click on the Process Payment button to make the transaction.
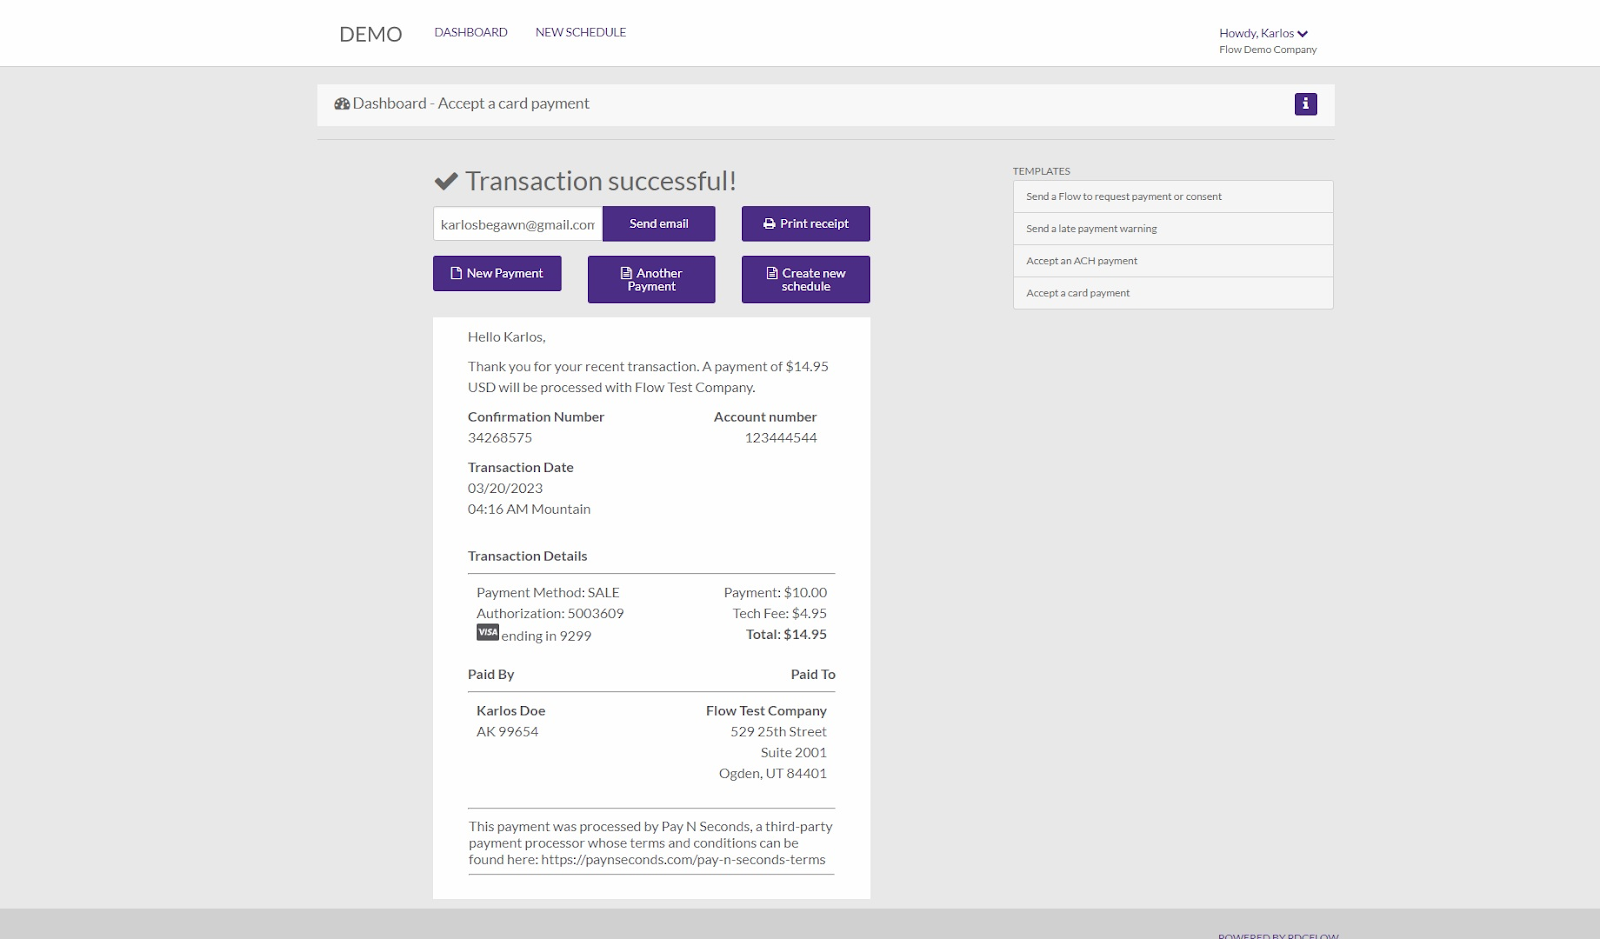
If the transaction is successful, a pop-up message of “Transaction Successful” (along with the confirmation number) will appear and you will be redirected to a Transaction Successful page.

The Transaction Successful page displays a receipt with payment details including the confirmation number, account number, transaction date, payment method, payment, fee, total, and some functionalities as follows:
| FUNCTION | DESCRIPTION |
| Send Email | Send an email of the receipt to the entered email address |
| Print Receipt | Print a hard copy of the transaction receipt |
| New Payment | Take a new payment with the same template, starting with a blank form |
| Another Payment | Take another payment using the same information as the current payment |
| Create New Schedule | Create a new schedule using the same information as the current payment |
Accept a Check (ACH) Payment via the Dashboard
To accept a check (ACH) payment via the Dashboard, follow these steps:
Step 1: Sign in to your PDCflow account and navigate to the Dashboard.
Step 2: Select a Check template (in this example “Accept an ACH payment” template) from the “Templates” section on the right side of the Dashboard.
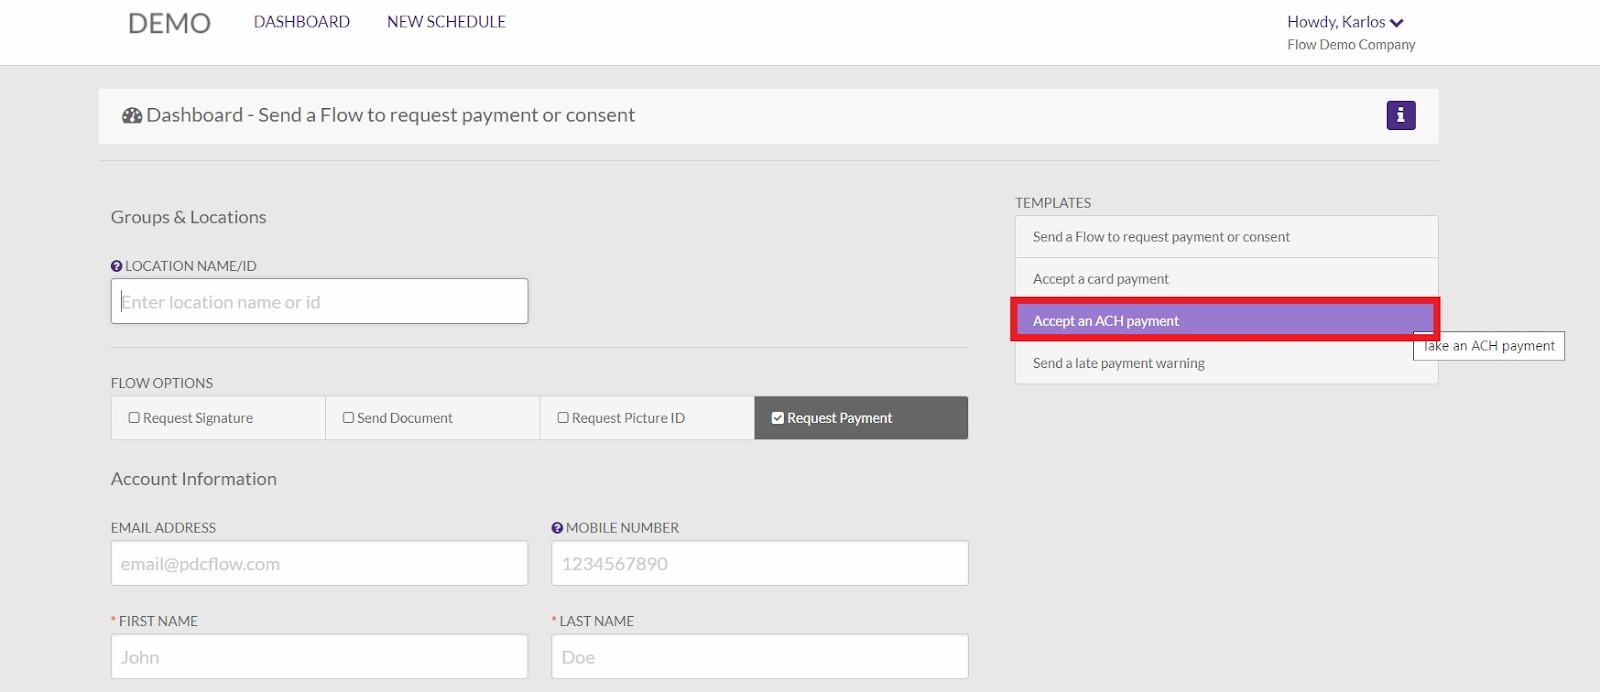
Step 3: Once you have selected a Flow template, enter the Location Name/ID in the form.

Step 4: Enter the Account Information of the cardholder, such as:
| FIELD | DESCRIPTION |
| First Name | First name of customer |
| Last Name | Last name of the customer |
| Account Number | Account number of the customer that you’re taking payment for |
| Email Address | Email address of the customer |
Step 5: Enter the Payment Information such as bank account number, bank routing number, bank account type, payment, fee, total, etc.
Step 6: After filling out the form, click on the Process Payment button to make the transaction.

If the transaction is successful, a confirmation message of “Transaction Successful” (along with the confirmation number) would pop up and you will be redirected to a Transaction Successful page.
The Transaction Successful page displays information such as confirmation number, bank account number, transaction date, payment method, payment, fee, and total. It also offers some options, including:
| FUNCTION | DESCRIPTION |
| Send Email | Send an email with a receipt to the entered email address |
| Print Receipt | Print a hard copy of the transaction receipt |
| New Payment | Take a new payment with the same template, starting with a blank form |
| Another Payment | Make another payment using the same information as this payment |
| Create New Schedule | Create a new schedule using the same information as this payment |
Still Need Help?
Please contact our Customer Success team at support@pdcflow.com for further assistance.